Reworking the layout in Excel to import dimensions, part II
- Aug. 14, 2014
| Example files with this article: | |
Introduction
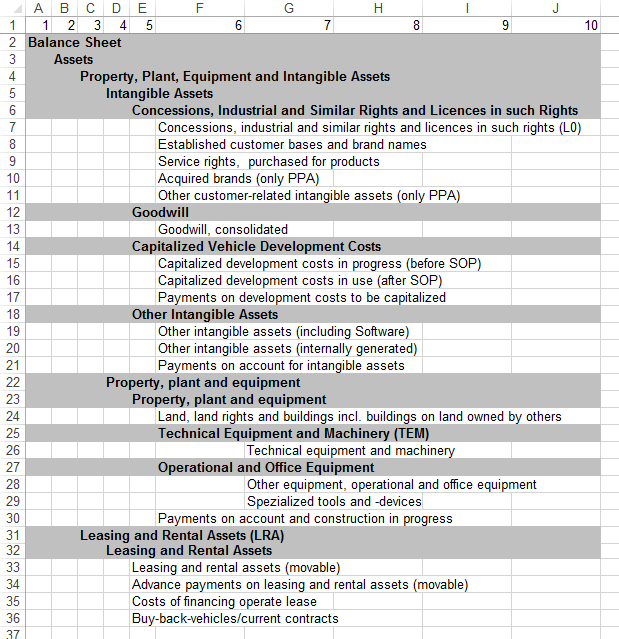
The second part of this article shows an interesting alternative way of solving the general problem of the first part of the article: how can we rework Excel layout's for dimensions in an easy and comfortable way so as to make the dimensions available for Turbo Integrator. As you read (or will read) the first part, you know that I explained a couple of handy Excel functions for doing lookups. After that, I loaded the text file into a dimension using TI. This article is similar: first an Excel formula, then marvellous TI scripting. Remember, this layout for a dimension with Balance sheet accounts had to be converted into a more useable layout. This article will present the way to convert this layout:
into this layout:
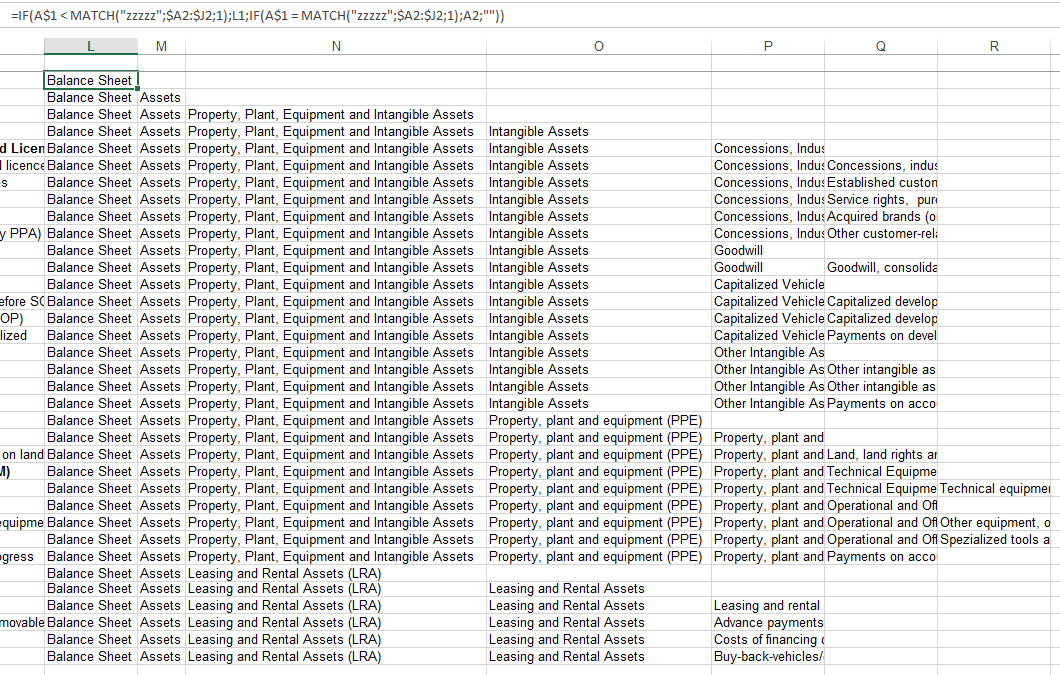
with only 1 simple Excel formula!
Formulas
Below is the formula and the explanation:

column L: =IF(A$1 < MATCH("zzzzz";$A4:$J4;1);L3;IF(A$1 = MATCH("zzzzz";$A4:$J4;1);A4;""))
If the index number of the column (in row 1) is smaller than the
relative position where we found the account name, then we repeat the cell from column L but from the previous row. If the account name is found at the relative position of the column in the output,
then we show the account name itself. In the other remaining case (>) we show an empty string as the result ("").
Not more than that. 1 formula that - by using relative references and a function like MATCH - fills in the blank cells from the hierarchical structure. Now this layout can be imported into a TM1 dimension for Balance sheet accounts.
-
We have 2 options:
- Writing TI code with a big number of IF clauses, since we do not know how what the last column will be for each record in the text file.
- Writing TI code that will loop through the columns of each record, and decide where to stop adding elements for that record.
Turbo Integrator
The EXPAND function in TM1 is very handy. See below, it's all code I needed to set up the Balance sheet dimension based on the new layout above. The variables (columns) are called conveniently V1 until V10. We will loop over numbers from 1 to 10 and use the EXPAND function to convert strings like 'V5' to variables like V5.
##### # Wim Gielis # https://www.wimgielis.com #####cDim = 'BS_Account'; cMaxColumns = 10; vCounter = 1; WHILE( vCounter <= cMaxColumns ); vElement = EXPAND( '%V' | NUMBERTOSTRING( vCounter ) | '%' ); IF( vElement @<> '' ); DIMENSIONELEMENTINSERT( cDim, '', vElement, 'N' ); vChild = EXPAND( '%V' | NUMBERTOSTRING( vCounter + 1 ) | '%' ); IF( vChild @<> '' ); DIMENSIONELEMENTINSERT( cDim, '', vChild, 'N' ); DIMENSIONELEMENTCOMPONENTADD( cDim, vElement, vChild, 1 ); ELSE; BREAK; ENDIF; ENDIF; vCounter = vCounter + 1; END;
A generic code to easily copy with a variable number of columns. Only the 10 is hard-coded as the maximum number of possible columns. Change as per needed.
It's not over yet
If you are interested in a little VBA procedure in favour of the short formula I demonstrated, please have a look at the file that you can download at the top of the page. A module is containing code for you to inspect and play around with.
Conclusion
As in the past, leveraging both TM1 knowledge AND Excel knowledge leads to very elegant solutions! The developer and the customer will benefit from reduced maintenance on coding and formulas.
